

How to design pricing plans and control access to features in your Bubble app
In this issue we'll look at how to design the pricing plans for your app, how to monitor usage and how to limit access to certain features to customers on certain plans.

Hi everyone!
Recently I’ve been spending a lot of time reconfiguring the pricing plans and tiers of my application.
In this issue, I’m going to dive into some of the best practices I’ve learned from running the app at scale and having gone through several iterations of my pricing strategy.
How to build a pricing strategy for your app
How to limit access to certain features to customers on a specific plan
How to incentivize customers to upgrade their plan
How to manage legacy plans and introduce new pricing plans.
All of these have been key to growing my app’s revenue and converting users from free to paid plans.
How to build a pricing strategy for your Bubble app
If you’re building a SaaS using Bubble, you’re going to need to consider how you want to charge users for using your app. Depending on what your app does there are lots of different approaches you could take, here’s a couple of options:
Pricing plans based on what features customers can use
Quota-based pricing, where customers can use up to a certain
Metered pricing plans which charge customers depending on how much of a specific thing they used
A single paid plan - keeping it simple by having a single paid tier which customers can subscribe to
The other thing you then need to decide is whether you want to have a ‘free’ level to your application, where people can sign up and use it in a limited way without payment.
Even though Bubble is still very cost-efficient when compared with a traditional software stack, you need to keep an eye on your costs and optimize your application - particularly since the recent pricing updates came into effect.
Using Bubble Option Sets for Pricing Plans
I recommend storing all the information about your pricing plans inside an ‘Option Set’ in Bubble.
There are quite a few benefits of this:
You can have as many pricing plans as you want, adding new ones and still keeping old ones active
You can store all the information about billing, usage and what features the plan can use in the Option Set
You can use the plan data in option sets throughout your UI and backend, for example, powering your pricing table, upgrade prompts and backend logic to limit usage.
Here’s an example of my pricing plan option set in Bubble:
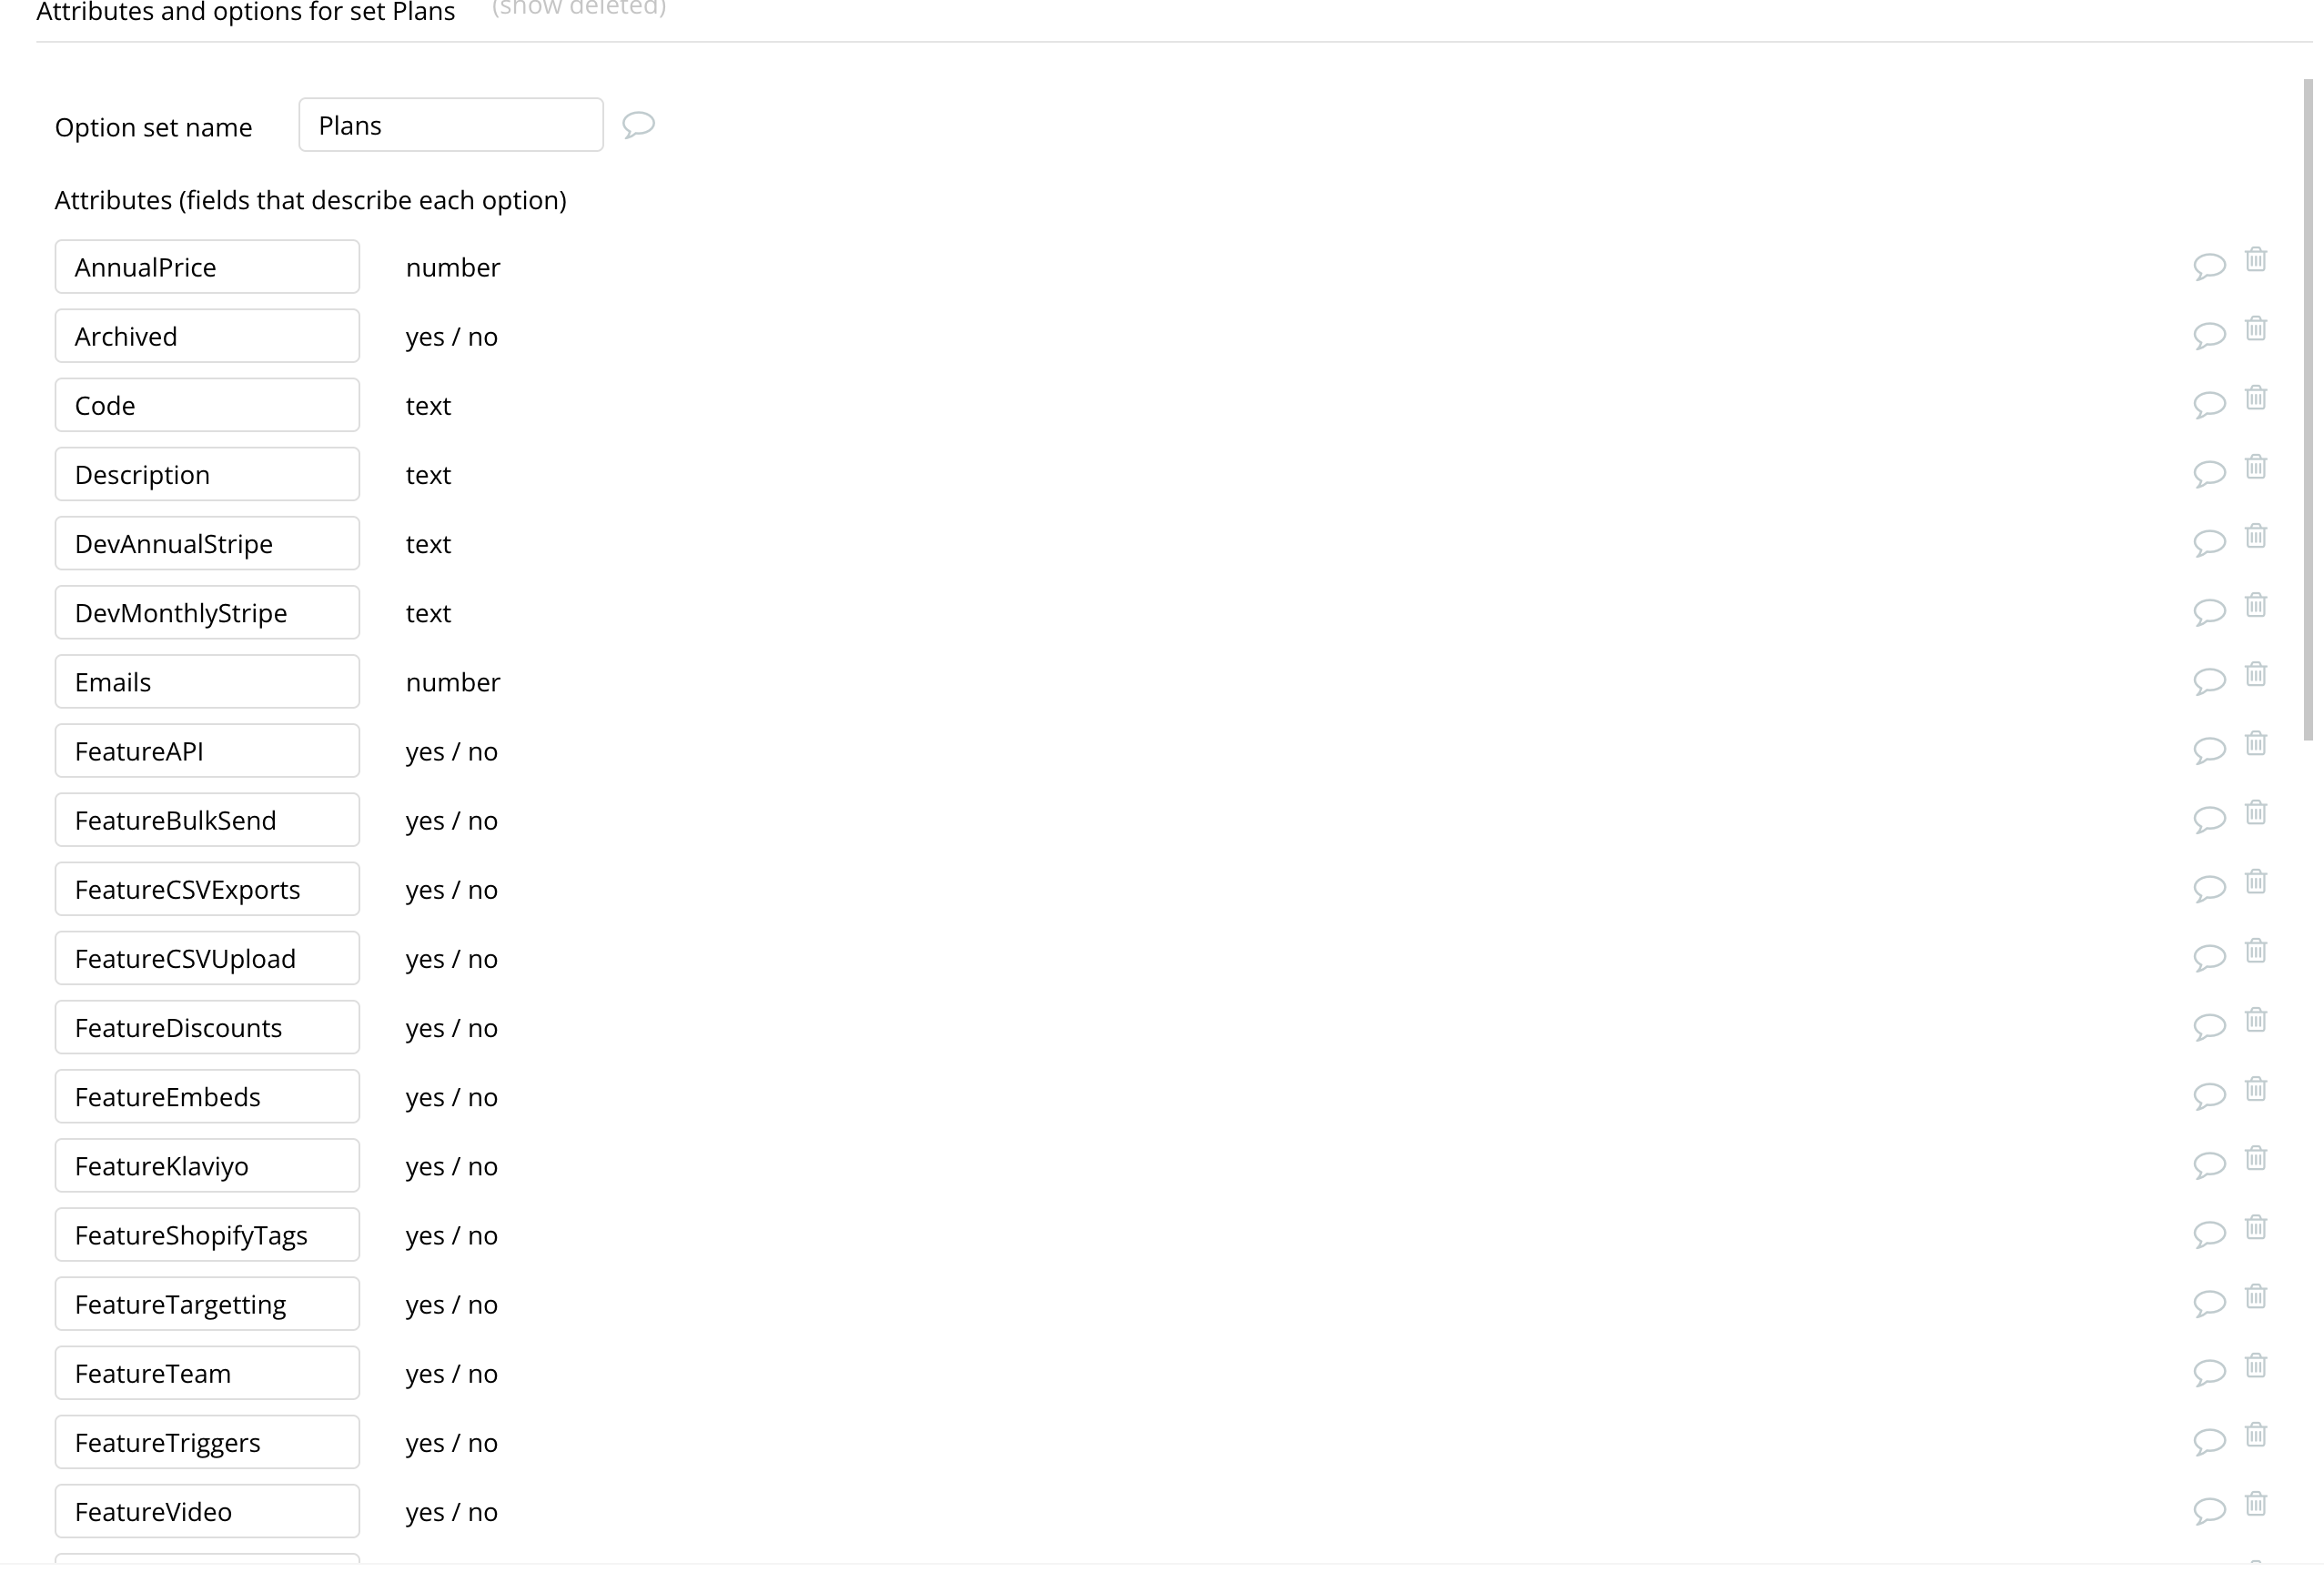
As you can see I’m storing a lot of information about each pricing plan I offer.
Here’s some of them…
Pricing info about the plan. Used to show how much the plan cost in our pricing tables and in the logic we use to control billing
Archived. Whether this is a legacy pricing plan or not, this lets us experiment with new pricing plans and retire old ones whilst still having active users on the plan
Feature Toggles. You’ll notice lots of feature toggles for individual features in the app, these control whether a given plan is able to access that feature. So in the front-end and back-end logic we can check whether Current User’s Plan FeatureAPI is yes or no, and if it is included in their plan let them use it.
Emails/Responses. These are numeric values which says how many emails the plan can send or how many responses it can receive. It’s shown on our pricing grids and in the application logic to decide whether a user is above or below their allowed threshold.
By storing all the info in an option set, you can easily make changes in the future about which plans can access which feature, how much a plan costs, or what the usage quotas of any given feature are.
Here’s how all my option sets look for each plan I offer….
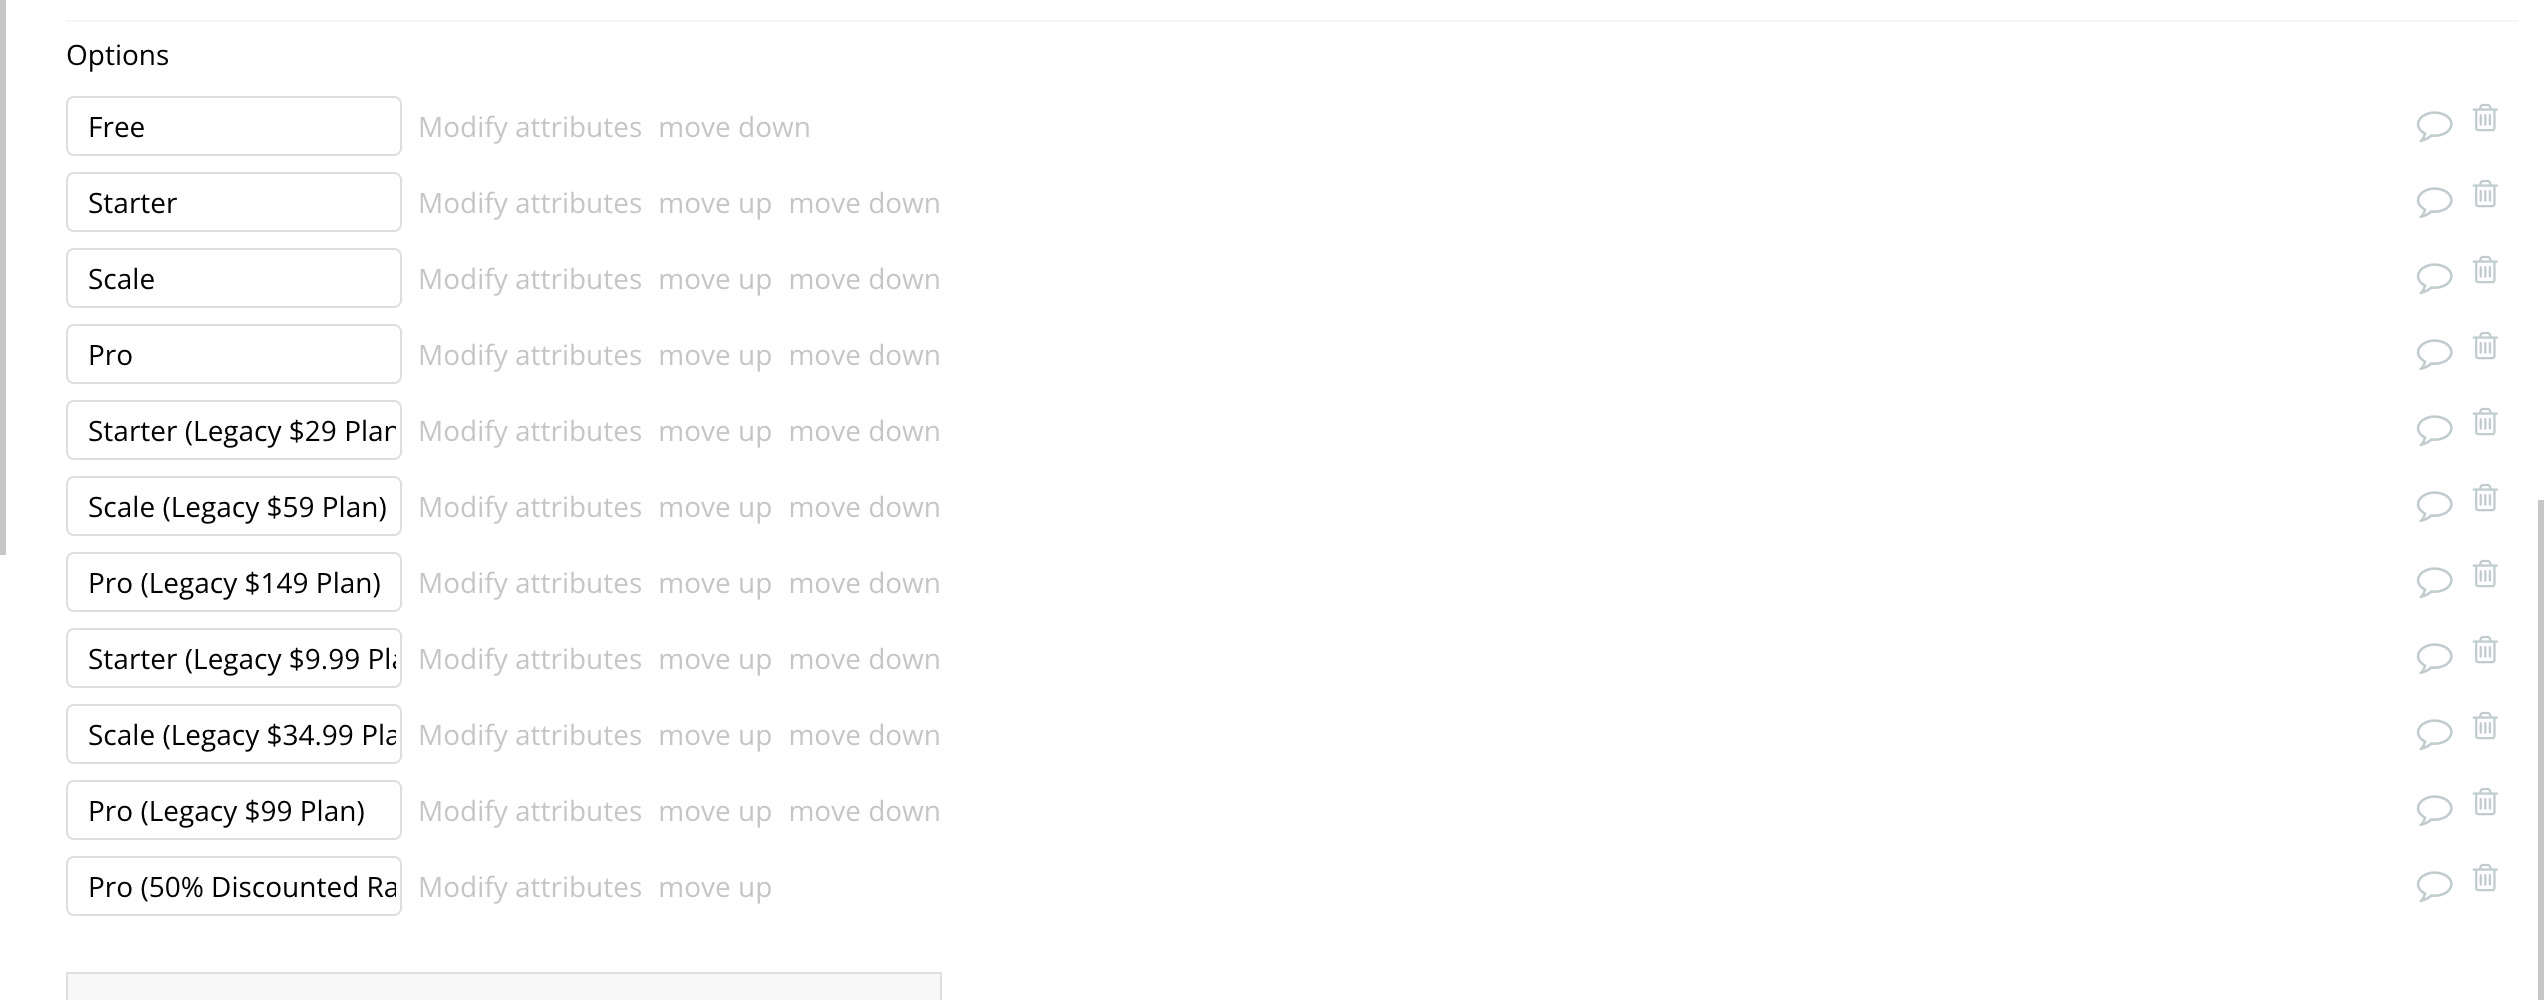
You’ll notice there are a ton of legacy plans, these are plans which are no longer offered to new customers but can still be used by existing customers. Keeping everything in option sets makes this easy to organize.
So whenever you want to change your pricing in the future, all you have to do is add new items to your option set!
Using Bubble Option Sets to Power Pricing Tables
As you’ve seen, now that we have all the information about each plan stored in option sets we can use that information throughout our application.
Here’s my app’s pricing grid, you can check it out live here.
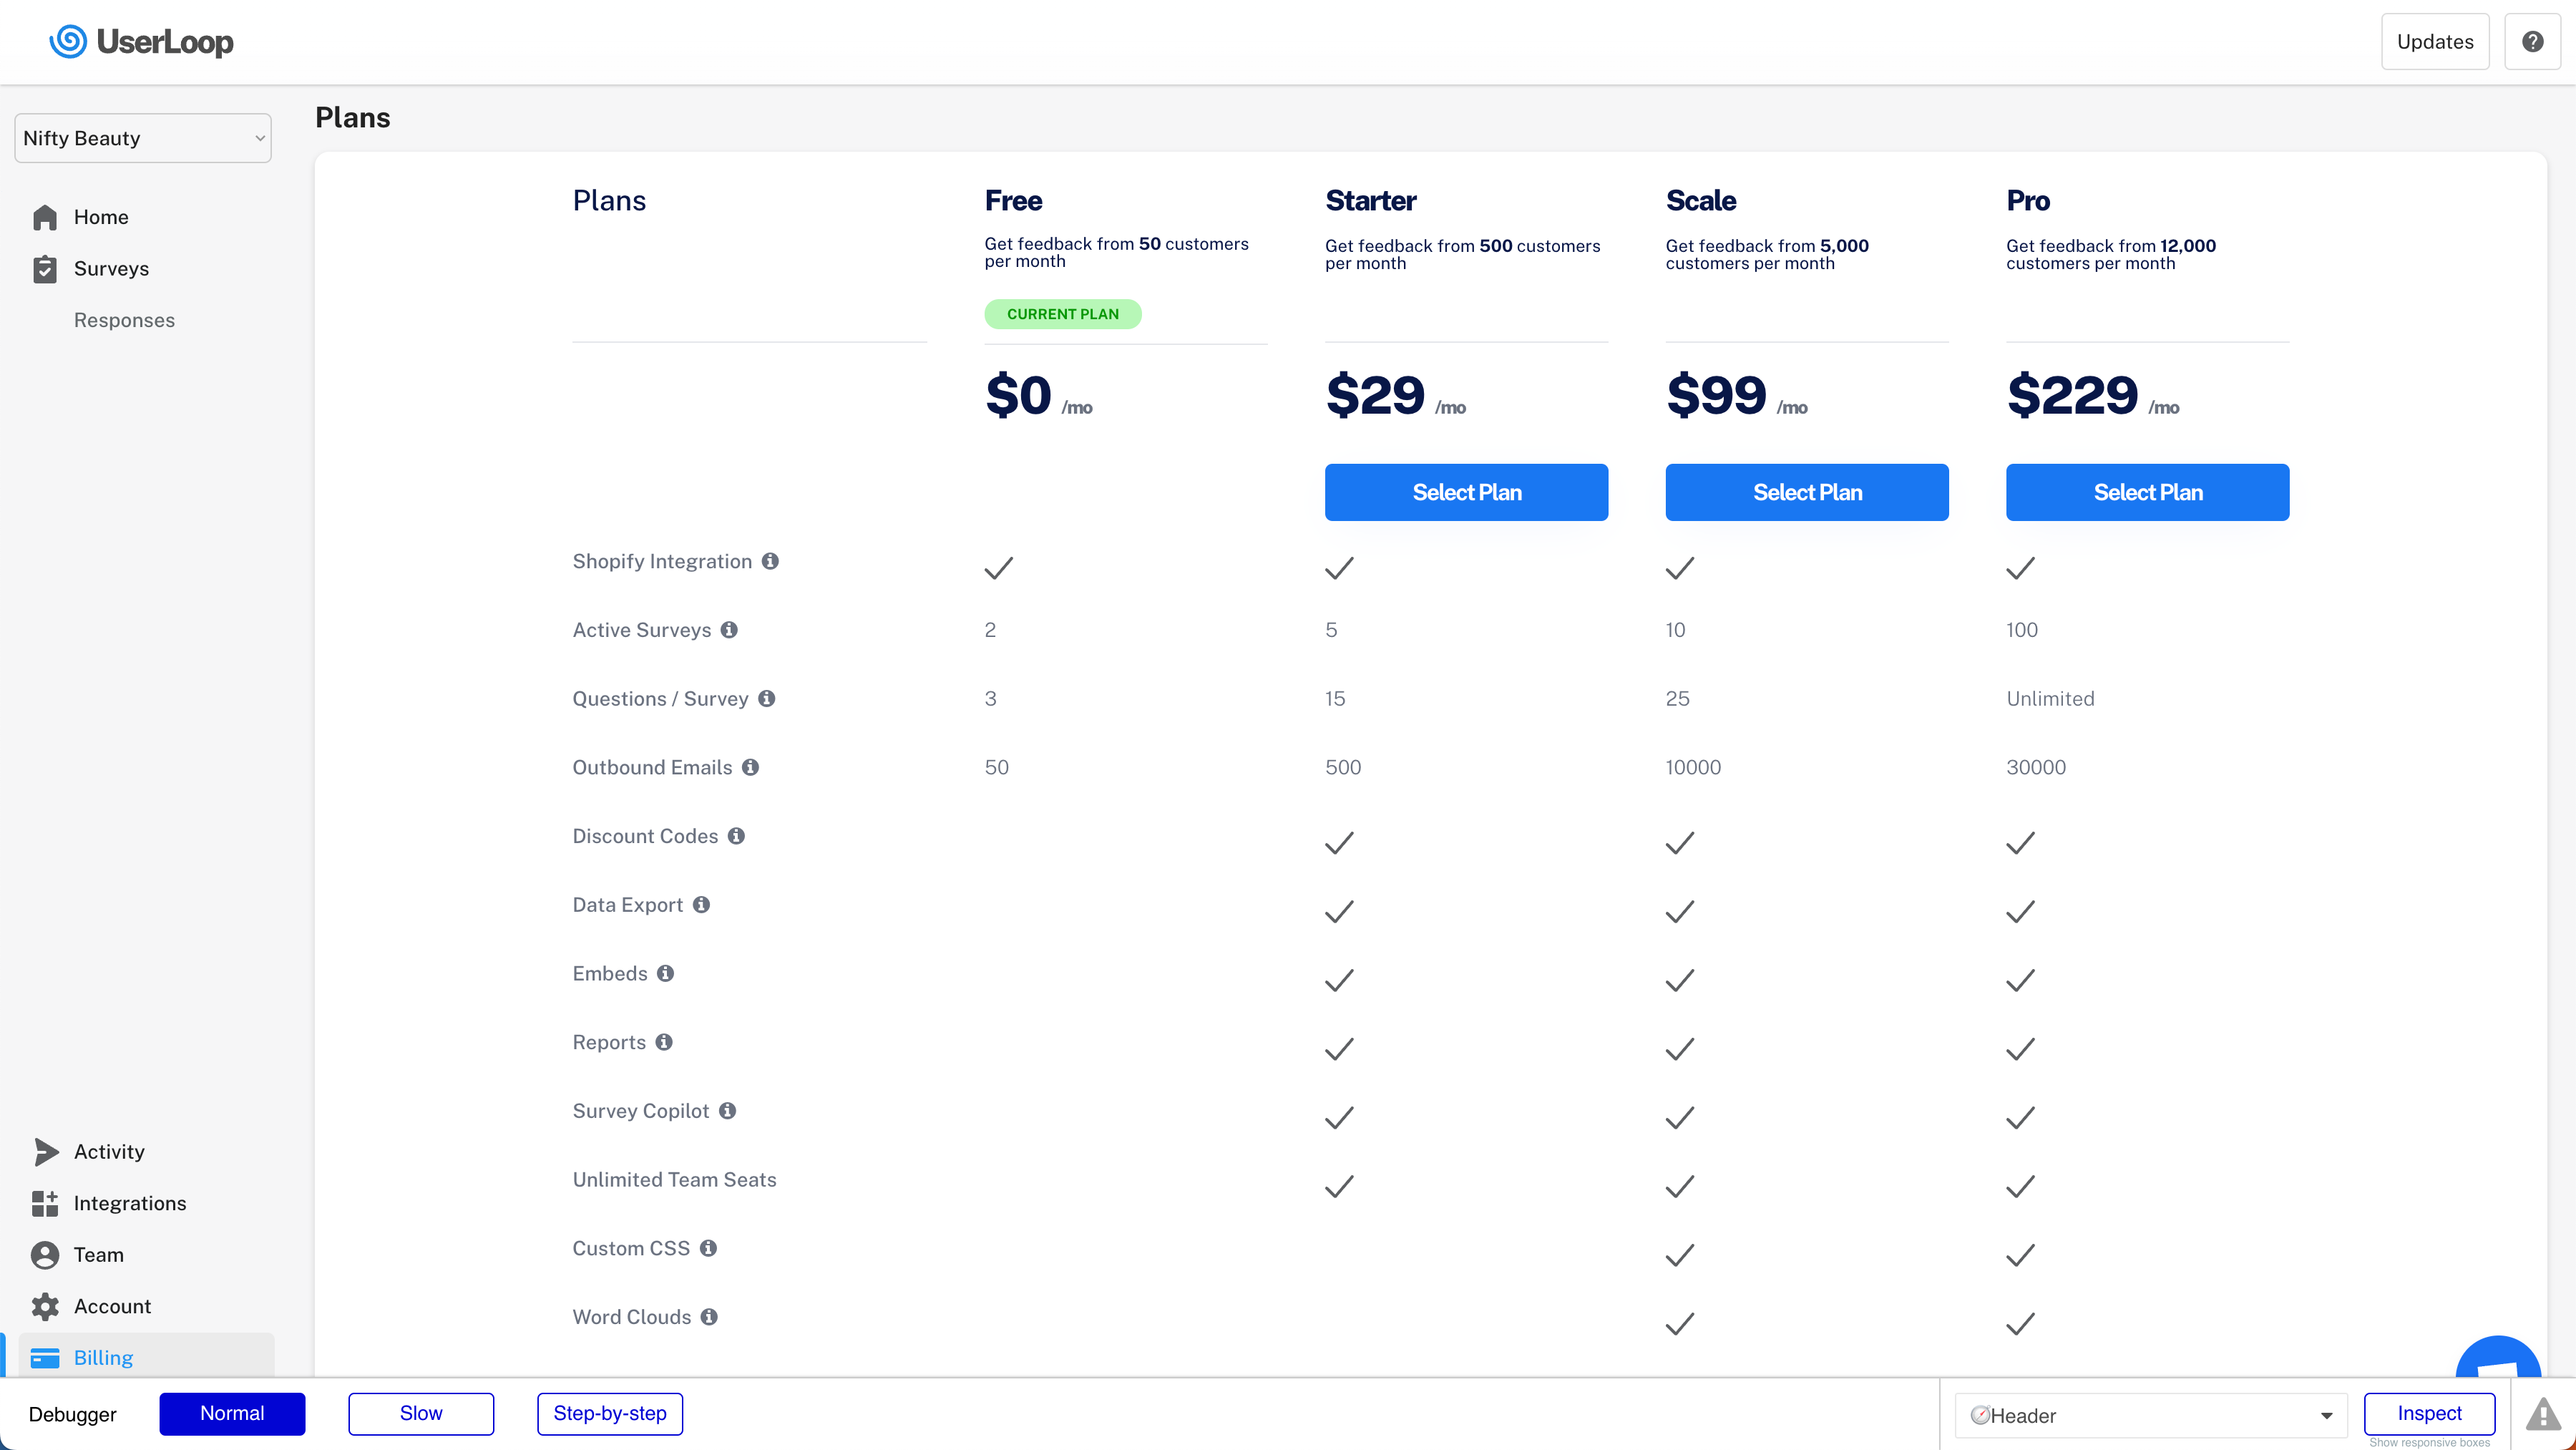
As you can see, every plan is shown and the price, features and quotas for every tier is clearly shown. This is all driven dynamically using the data from our option set. So if we change any prices or quotas, our pricing grid will update automatically.
Here’s how it looks in the Bubble Editor…
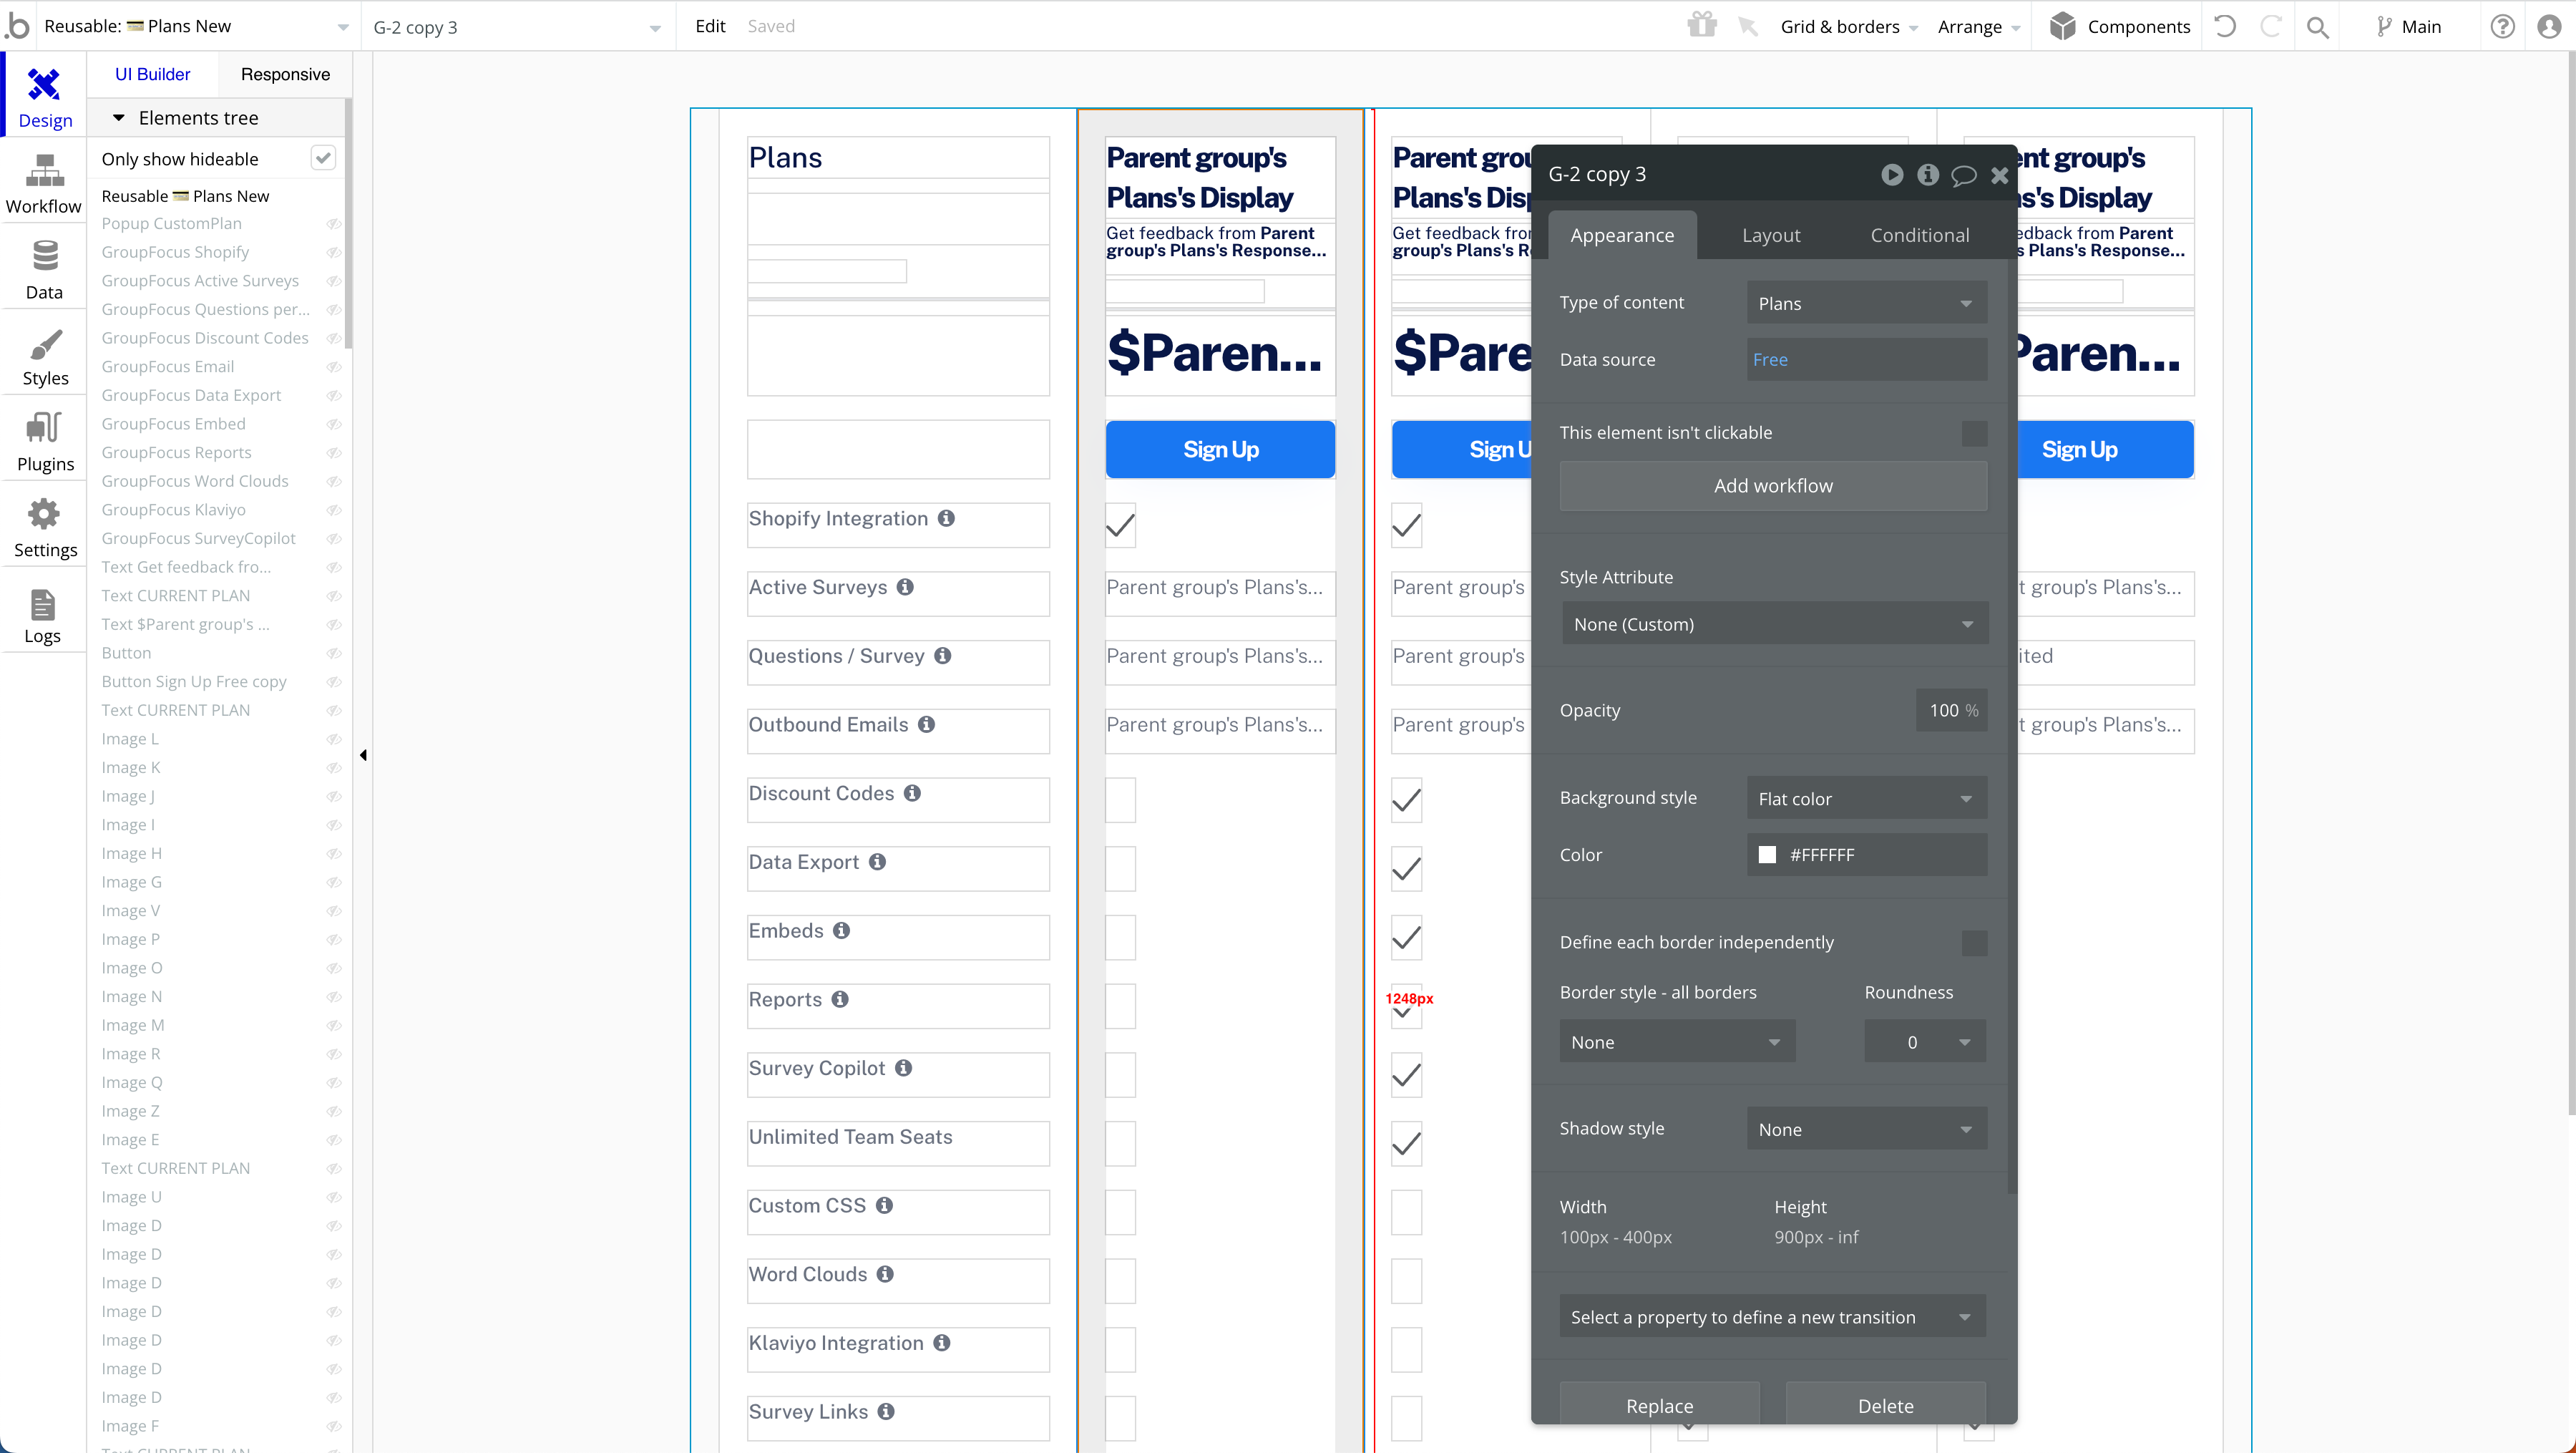
As you can see, each column has a Type of content of Plan which refers to our option set. We then add a new column for every plan we offer and set the data source for the column of the plan you want to show. You then just have to make sure all the data in the column is referring to it’s parent.
The added benefit of this is you can copy and paste the columns without changing them, all the data is shown dynamically from the option set!
Adding tooltips to your pricing grid
It’s good practice to explain as much as you can about the benefits of each feature when customers are looking at the differences between your plans.
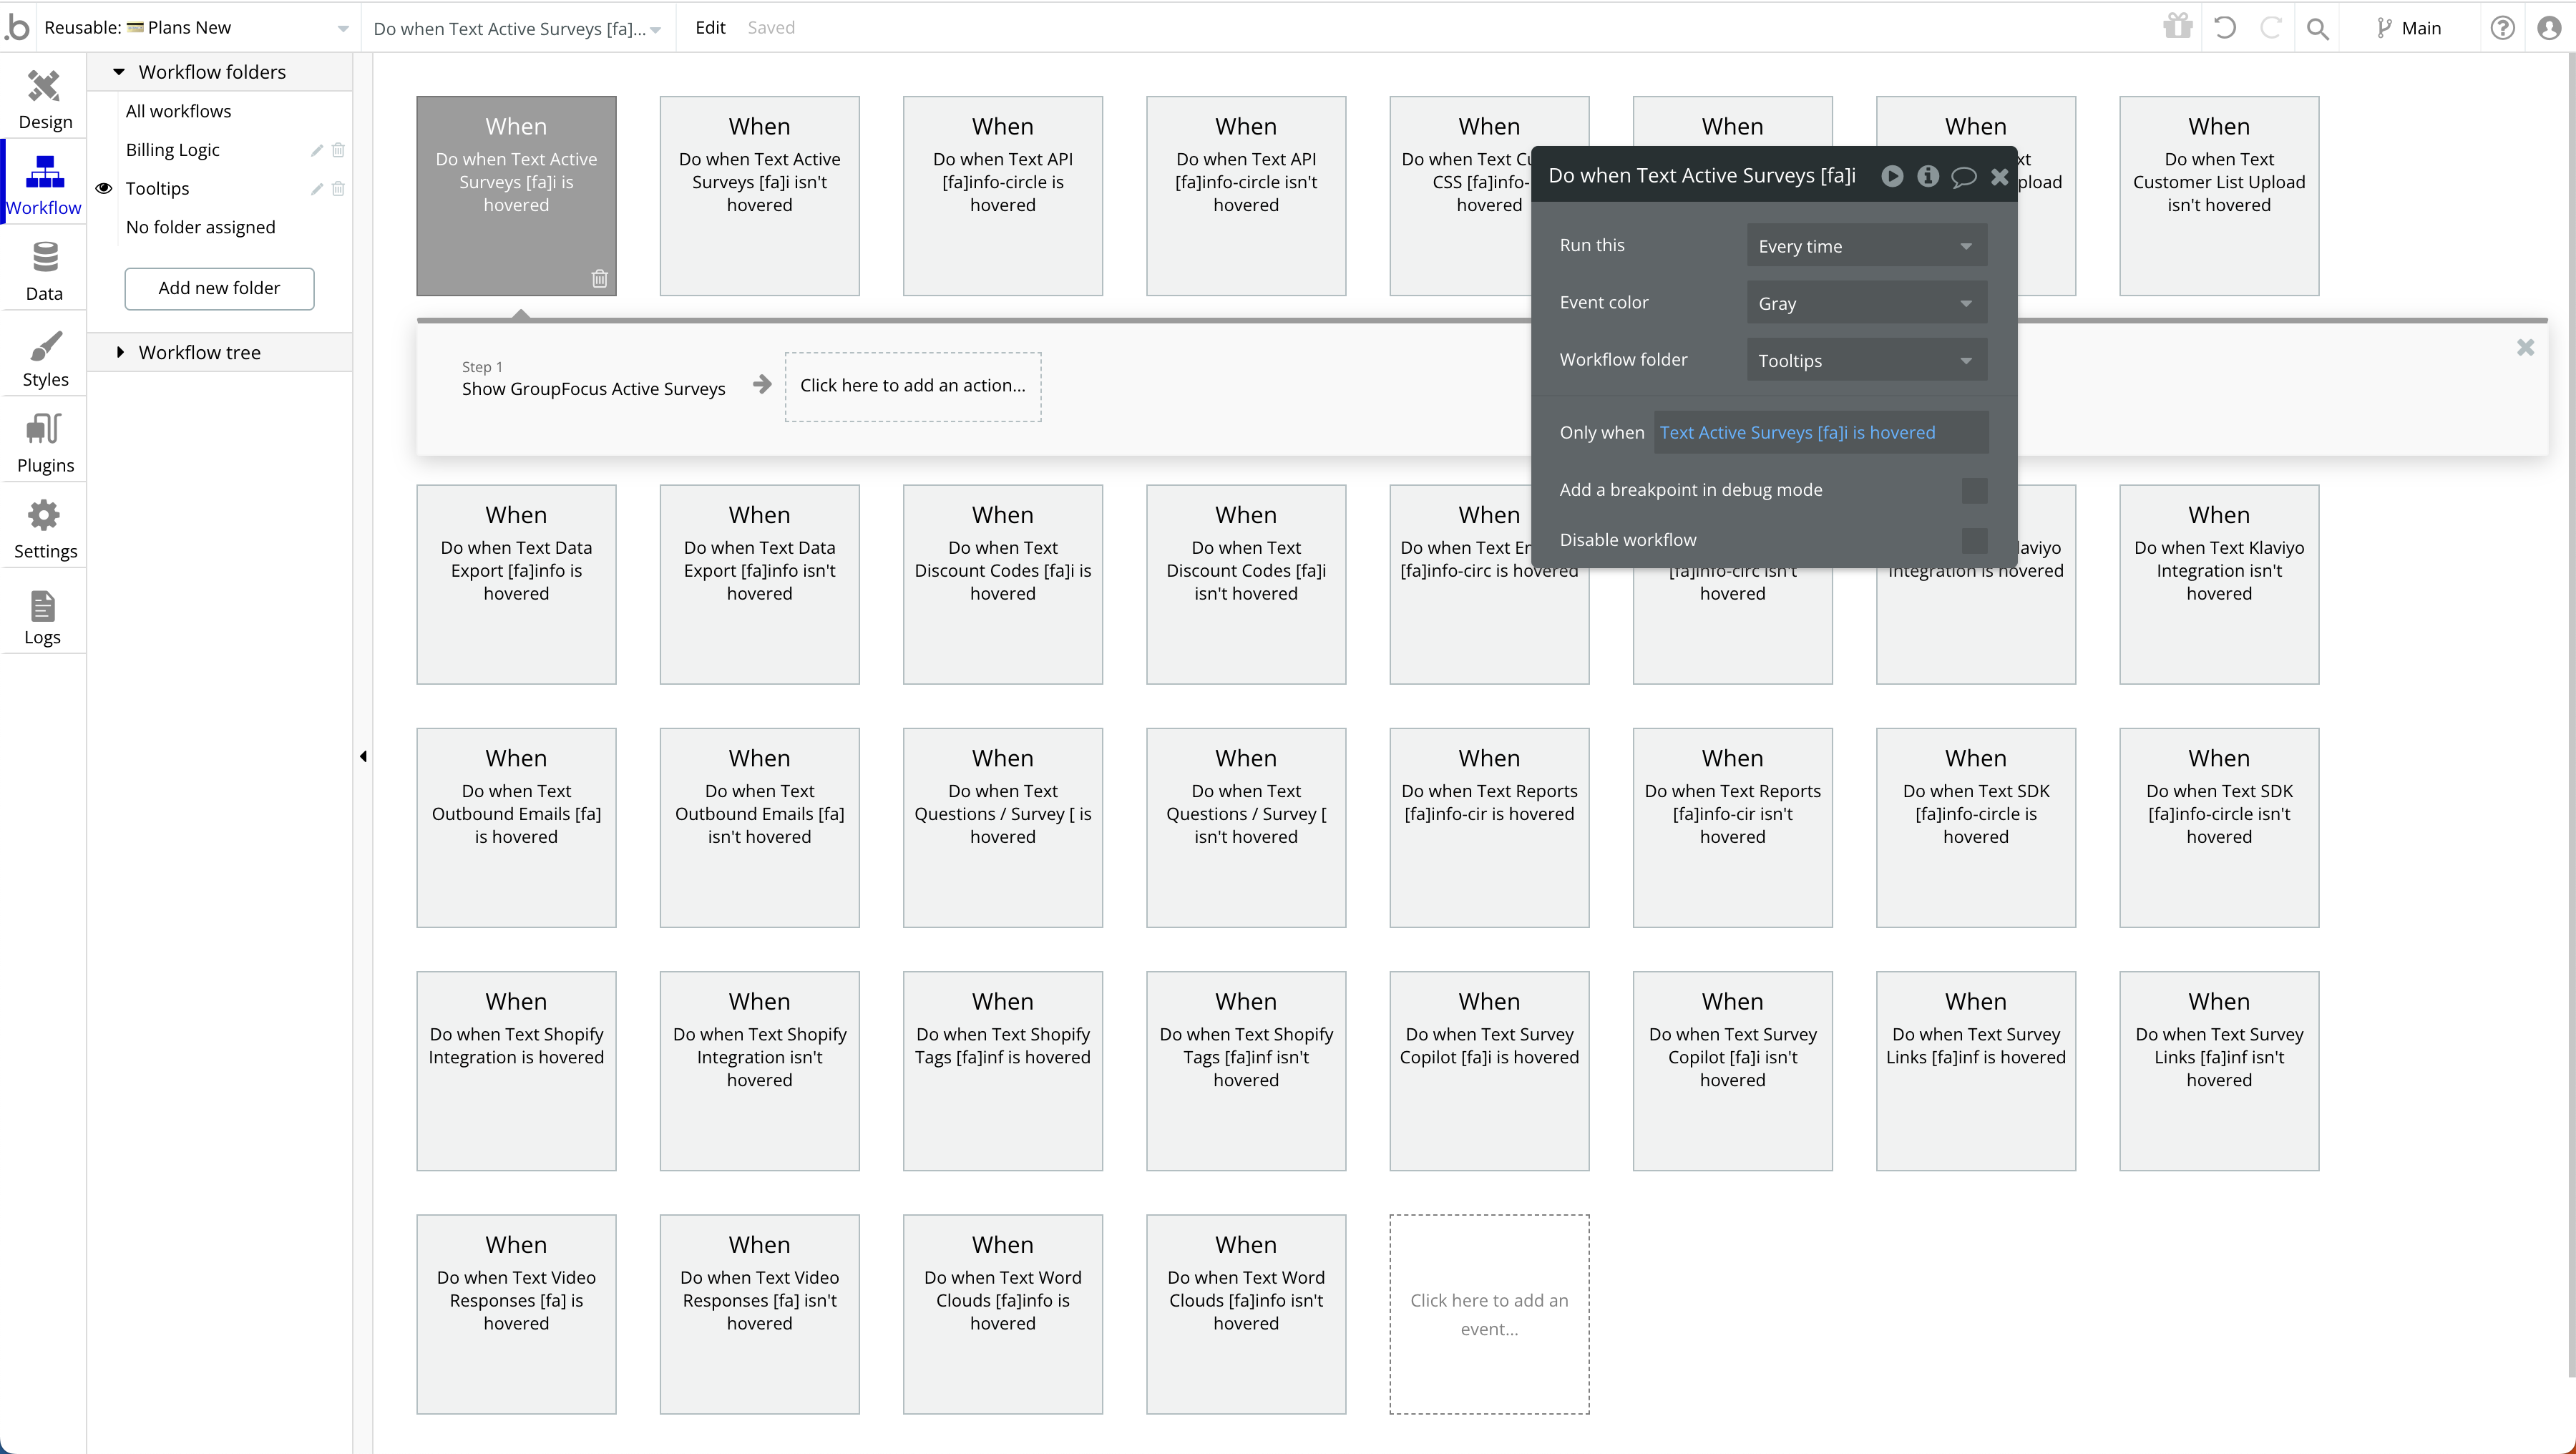
To do this, I use ‘Group Focus’ elements which are shown when a user hovers over a specific feature.
This means customers can quickly learn more about a feature without having to leave the page.
Here’s how it looks:
To do this, simply add a ‘Group Focus’ element to your page and add some workflows to control when they are shown.
For example, when ‘Feature Exports’ is hovered, then show this group focus.
As you can see, depending on how many features you want to do this for you might need quite a workflows for showing and hiding the tooltips!
Showing Plan Usage In your App UI
It’s good practice to show users how much of their current plan’s resources they’ve consumed from your app’s home screen.
This makes it crystal clear to them which billing plan they’re currently on, how much they’ve used and what their allowances are.
This can also be a major driver of paid upgrades in your application, as users see they are close to or above their usage threshold, they then are triggered to upgrade their plan.
Here’s how my home screen plan widget looks in my app UI:
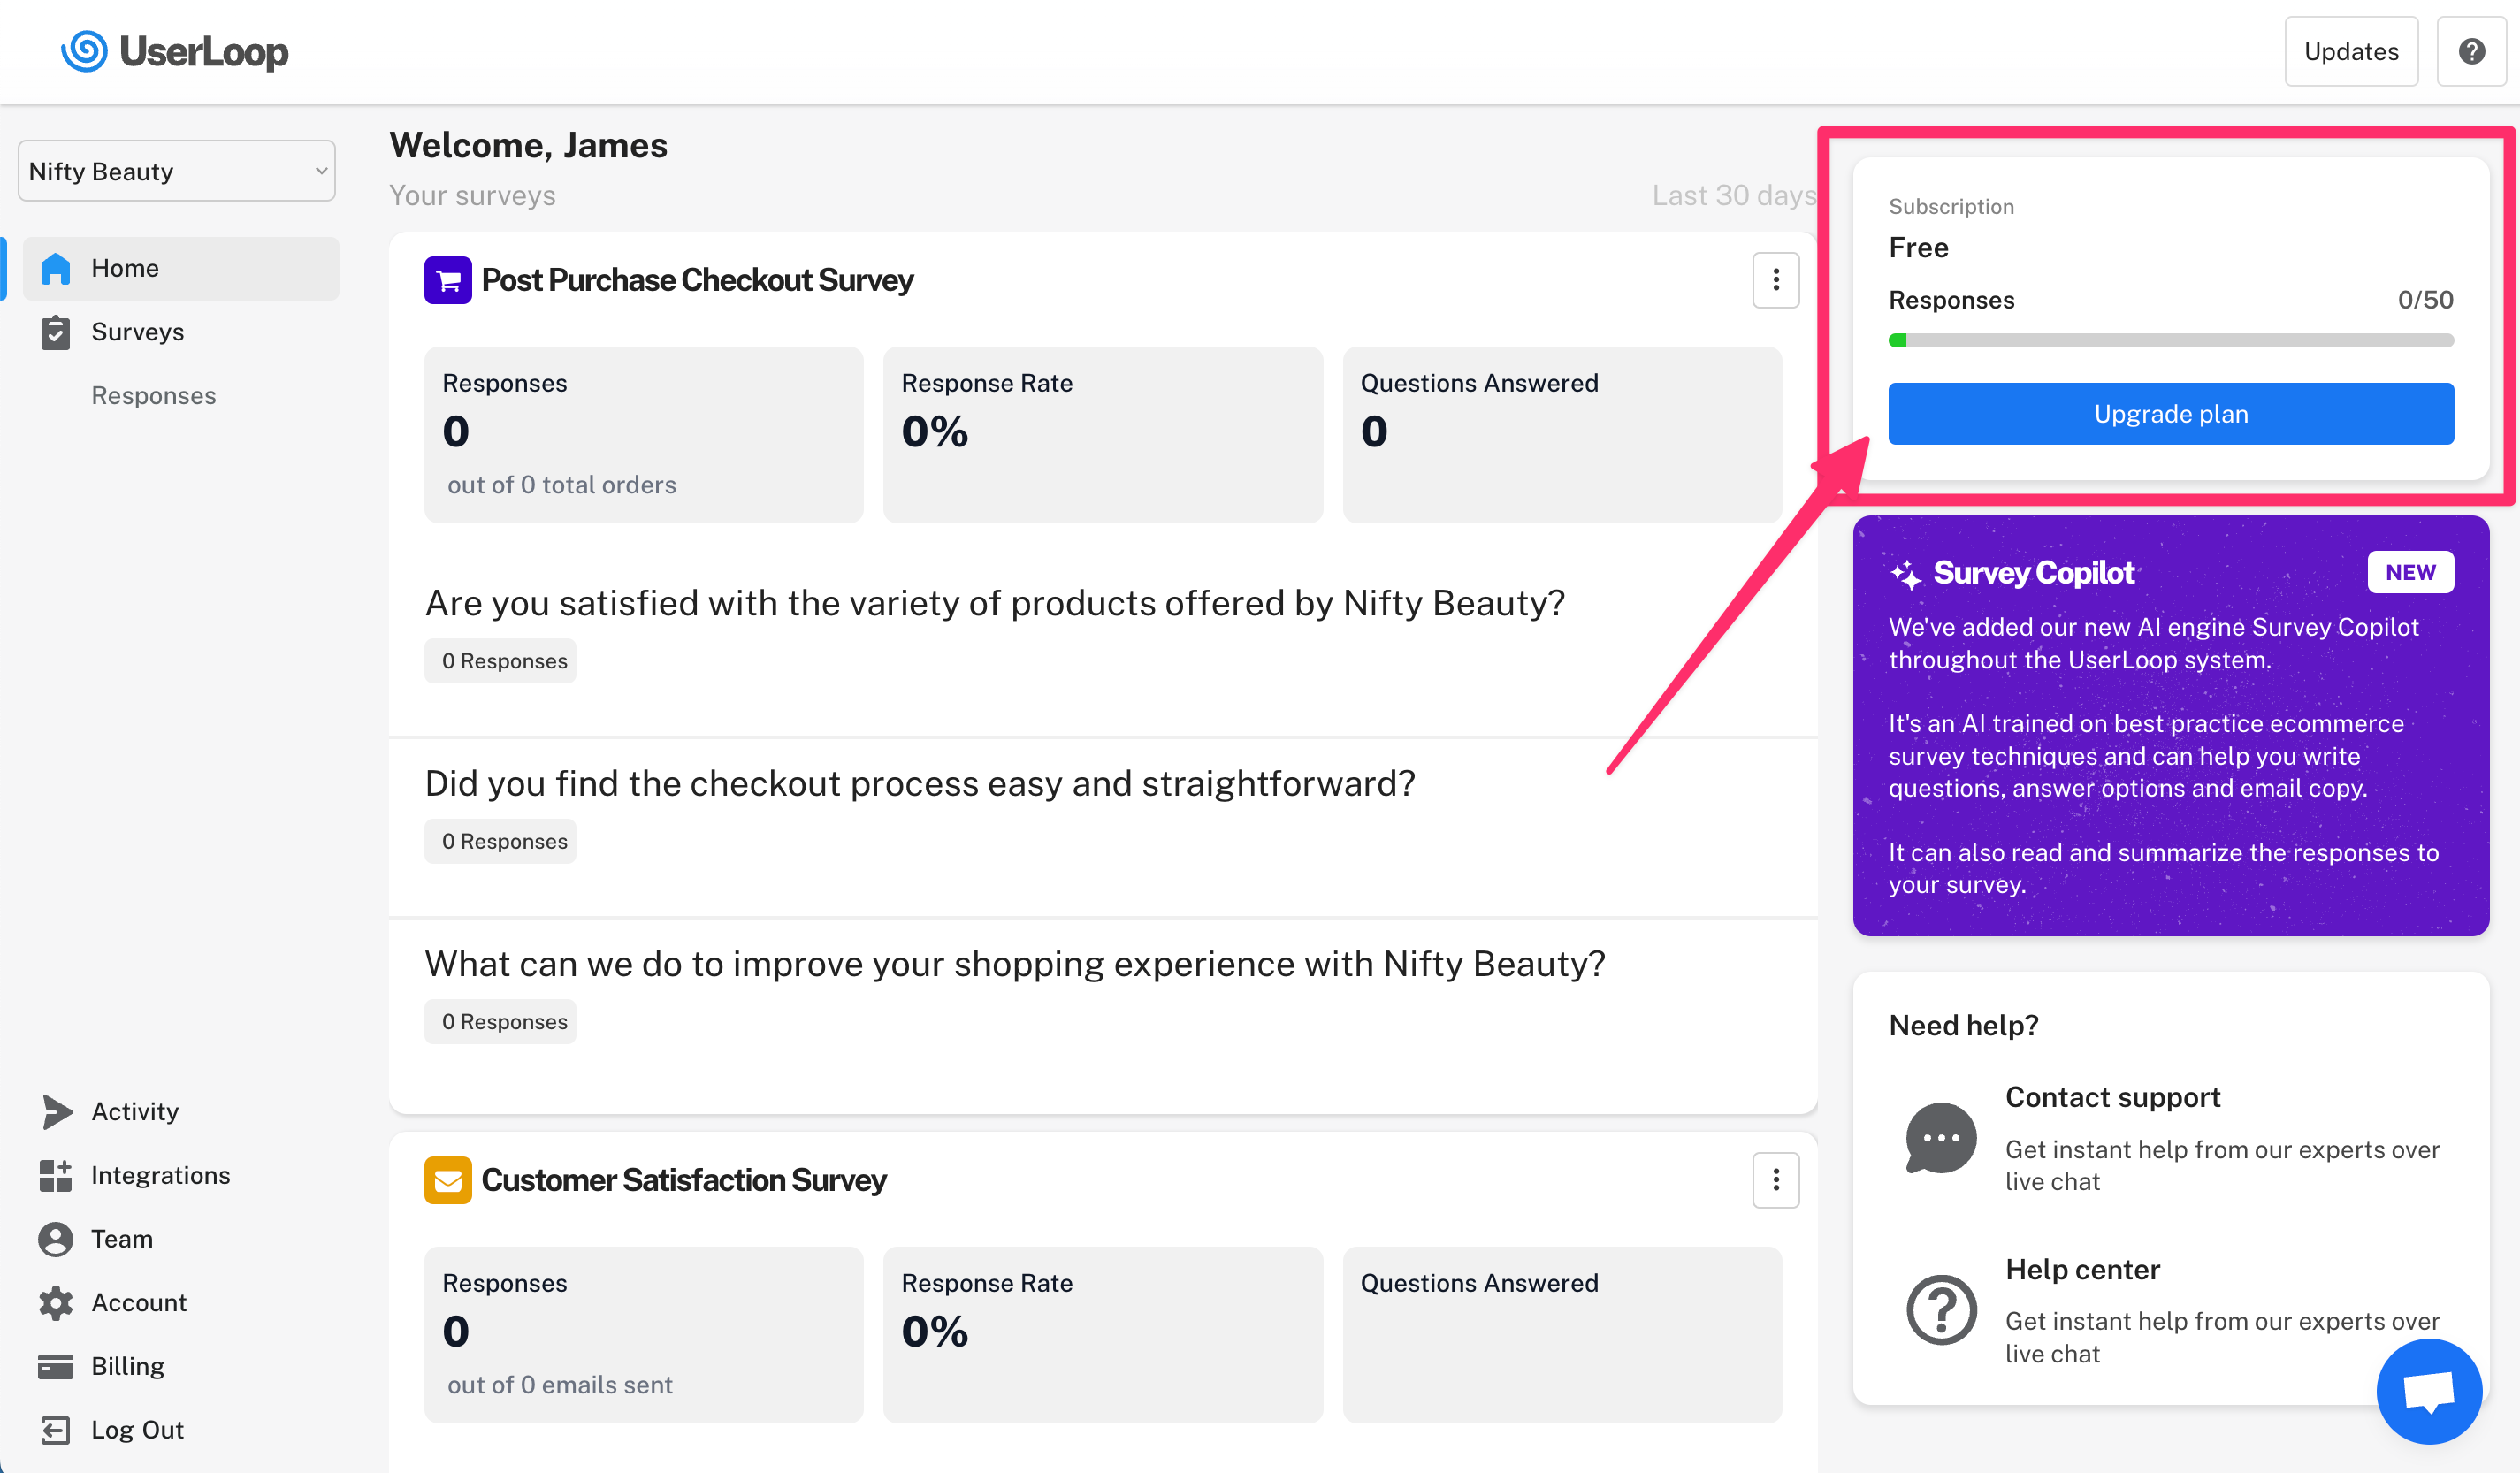
As you can see we are showing a few things:
The user’s current plan
How much of the usage allowance they’ve consumed
A link to upgrade their current plan
All this is driven by the data we stored in our option sets, so it will be different for every user depending on which plan they’re on and how many resources they’ve used.
Prompting Upgrades Based On Feature Usage
A key driver for getting people to upgrade in my app is when they try to use a feature which isn’t included in their plan.
For example, when a user below tries to create a new survey, they’re shown a popup prompting them to upgrade.
It shows information about the feature they’re trying to unlock and links them to the payment page.
To do this, we have some conditional logic which checks whether or not a user has enough capacity left on their plan to complete the action. If they don’t we instead show a popup related to that specific feature with a prompt to upgrade.
Need help planning or building your app?
I’ve been working with several startups building with Bubble over the last few years to help them with planning, application structure and build.
I really enjoy the process of working with startups to bring amazing new products to life using Bubble so I’ve decided to open up a few more client spots, I’ve added a page to the blog with a bit more information.
If you’re looking for help with your Bubble build, planning or troubleshooting take a look or drop me a reply to this email!
Thanks again for reading, let me know if you have any feedback or other topics you’d like me to cover in the future.
James.
Great read! Just had this question on my mind and this info was super useful. I'd be curious to learn more about how you automate the billing process for someone once they choose a plan, if you're looking for topics to write on...
Such an incredible breakdown. This can make scaling an app way easier. I use an API so customers purchasing upgrades is definitely part of the plan.