

🎥 How to use video APIs to turbo charge your Bubble app + platform updates - Issue #27

Welcome to this week’s NoCodeSaaS - the newsletter for people who want to build a successful SaaS business using no-code technologies.
This week’s newsletter is all about 2 things:
Capturing + managing video content in your Bubble app
Roundup of the recent major updates to the Bubble platform.
As you might have seen, Bubble have been busy adding some big functionality over recent weeks. Many of these changes have been on my wish list, so I’ve been excited to try them out. I’ll give my first impressions at the bottom of this newsletter.
Recently I also spent a lot of time improving my app UserLoop’s video capabilities.
At the start of the year I implemented MVP version of being able to capture and upload videos through the platform.
The feature proved popular so I have been working to improve the speed and efficiency by utilising a third party video hosting platform.
I’ll cover how to set up all the required plugins and APIs to smoothly handle user-generated video content in your Bubble app.
June is Plugin Month for the NoCodeSaaS newsletter.
For each issue in June I’m going to be taking a deep dive into the absolute best plugins on the Bubble platform.
Explaining in depth what you can do with them, how to set them up and how to leverage them to build unbelievably powerful apps without code.
So with that said, let’s dive right into this week’s issue!
Adding UGC Video Capabilities to your Bubble App
At the start of the year I added a MVP version of user generated video uploads to my Bubble app. The feature let customers upload a video as a response to a survey question, and for that video to be played back through the admin panel.
As I just wanted to test demand for the feature, I implmeneted it in a very basic way, simply using Bubble’s native file storage to store the video files, and a simple video player plugin to allow the clips to be played.
I was happy to see a lot of users ended up using the feature - but this also alerted me to a problem. Simply uploading video files to the Bubble filesystem and replaying them back from there resulted in a pretty horrible user experience.
Videos took a long time to load from storage, and sometimes failed to load at all.
After some advice from Bubble video pro JJ Englert, I investigated the Mux video platform and API as a solution for hosting my UGC video content.
I had a play with the platform and was super impressed, it has a simple set of APIs which work really well with Bubble and the pricing is really reasonable.
They price primarily on the number of views a video has, and given my app only allows logged in users to replay video content - I’m expecting my bill to be under $20/ month for hosting around 500 videos per month.
I’ll walk you through I set up Mux with my app, it’s been working incredibly well for me and videos now play instantly instead of taking an age to load.
Uploading Video
Here’s what the video upload page looks like in UserLoop. This is using the fantastic Uppy Pro plugin.
As you can see the user can decide to either select a file from their camera roll or record a video right from their device’s webcam.
This works great on mobile - in fact, most people use an iPhone for uploading their selfie videos in my app!

The Uppy Pro uploader interface
I have a few workflows which trigger off once the user has uploaded their video file on this page.
Once the file is selected, I create a new upload record in my database and attach the uploaded file to that.
At this stage I’m still just storing the file directly to the Bubble file storage. All the mux video rendering is handled separately by backend workflows.

Once the file is uploaded, I create a new record in the DB and attach the uploaded file.
Processing Video
The next step is taking the raw video file uploaded by the user and processing it with Mux to generate an instantly playable, YouTube style video.
This is all handled by backend workflows.
Before those, you need to set up a Mux account and get your API keys - you can experiment with the API for free, videos are just limited to 10 seconds and have a watermark.
Once you’ve got your API key, we need to set up the Mux video upload endpoint in the Bubble API Connector.
You can read more about this in the Mux API docs, but here’s my setup below. It’s pretty simple, the trickiest part is encoding your API keys to base64, you can do that on a site like this.

Setup Mux in the API connector
Once you’ve got your API connection set up, we need to set up a new backend workflow to look for newly uploaded video files, and to send them to Mux to be rendered.
To do this I create a backend API workflow to complete the task, which is triggered by a Database Trigger.
That means, whenever a new upload entity is detected in the database, this trigger will fire and run the workflow to render the video.
Here’s what the database trigger looks like…

When a new file is uploaded, this trigger will run and request the mux workflow to start rendering.
After the file is uploaded and that workflow is triggered, it in turn triggers the Mux endpoint we set up earlier.
This sends the video file currently hosted on Bubble to Mux and returns an ID for the video render.
We need to store that ID in our database so we can use it later in our video player element to play the video hosted on Mux.
You might notice the final step in this workflow is scheduling a workflow called ‘delete-video-upload’. This is set to run 1 hour in the future and deletes the original video file from the Bubble storeage system - we don’t want to end up storing the video in Mux and in Bubble!
This means once the video is sent to Mux and rendered, it’s totally deleted from Bubble.

So, once this process is complete, here is what will have happened.
User uploaded a video file using the Uppy Pro plugin
The video file they uploaded was stored to the Bubble file system
Bubble detected a new file was uploaded and runs the ‘mux’ workflow to render the video with Mux
We store the Mux render ID to our upload object in the database
We use the Mux render ID to replay the video in our UI.
Here’s how the replayer itself looks in Bubble. To do this I’m using the VideoJS Pro plugin which has a deep integration with Mux.
To replay the video, we add the VideoJSPlayer element to our UI.
To populate the video URL we add the standard Mux replay URL and add in our video’s ID

Add the VideoJSPlayer element and populate the video URL from your DB
When we’re finished and run our app, we’ll have a video player which loads instantly and replays videos of any length without any problem at all!

The video replays from Mux instantly, no lag!
It’s absolutely possible to build powerful video features in Bubble which can easily scale to many users by using external APIs like Mux.
I encourage you to try it out yourself on a test project, it’s fun medium to work with and you can build some really cool things.
Bubble Platform Updates
You might have noticed Bubble have made some major updates to the platform recently, here is my take on a few of my favourites.
You can turn most of these on in the new ‘experimental features’ menu in your app’s settings.
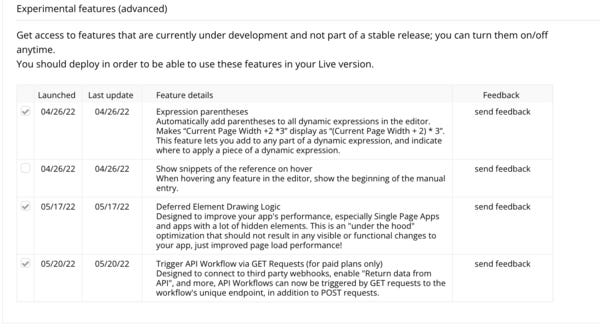
This one is a super handy one - particularly for people like me who need to go back and edit complex expressions. In the past this was a bit of a nightmare but it’s much easier now with this feature turned on. It makes all your expressions editable, and splits them up into logical chunks based on the logic. This means you can click anywhere in the expression and start making edits, which was not always possible before. Nice!
Here’s an example of one of my expressions with this turned on, everything is much easier to edit and the logic is clearer.

Custom Events with multiple parameters
Up until now, custom events could only relate to a single parameter. This limited their usage and meant you often had to end up using backend workflows to do complex repetitive actions.
Whilst in many cases you should still use backend workflows for performance reasons, it’s great to be able to add multiple parameters to custom events on the front end.
GET requests for backend workflows
This has been on my wish list for a while. Up until now, it has only been possible to trigger backend workflows with a POST request. Some APIs require calls to be made with a GET request, which made things tricky.
To get around this previously, I routed requests to my Bubble via AWS API Gateway which can transform the request from POST to GET. Now you don’t need to do that!
This is exciting as it means you can now pretty easily build out a full REST API suite for your application using backend workflows alone.
I hope you found this issue helpful! I’m excited to start Plugin Month from the next issue.
What did you think of this issue, is there anything else you’d like me to cover or got any questions? Hit the reply button - I respond to every one. Until next time happy building!
James.